skip to main |
skip to sidebar
 First I would like to let you all know that this will be the last lesson post I will make here on Yahoo 360 since will be closing in July. I will try and leave this post on 360 as the final post so everyone will have a chance to take note of my Flickr and Blogger and also Yahoo Profile site address’. I will continue the lesson post along with sample photos on the above mentioned sites and also you all can contact by e-mail with any questions you may have.
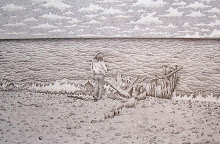
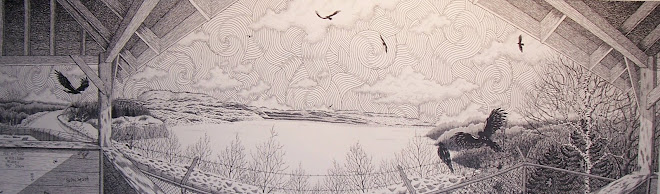
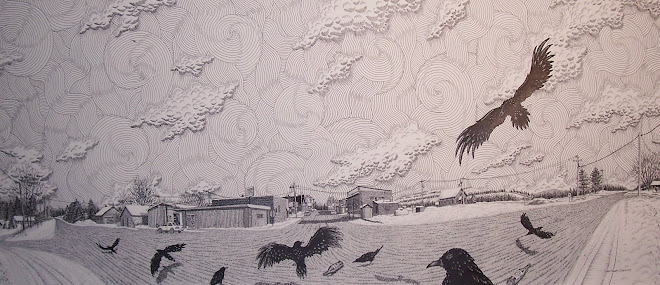
Now in this lesson I have just continued with the stippling using my .25 mm pen but before I did I sketched in some crow’s directly behind me and will just ignore the crow flying above. I often do this in a piece because you just get better idea’s as you are delving into the piece and I like what came to me so I went with it. I just used my .30 mm pen to ink the birds in remembering to leave the highlights of the feathers visible where later in the piece we’ll come back and add detail to them but for right now just ink in the birds. I also used the .30 mm pen to begin lining in the fence to the right. I also used my .30 mm pen to complete the curved line work running along either side of the pole just in front of the wooden fence.
In the next post I’ll begin working on the buildings behind my subject. Also when viewing the Blogger site when you click on the sample photo’s provided with each lesson you will be able to see in greater detail the techniques used for those of you that may be visually impaired and want a higher resolution sample photo. But Flickr has the exact same posts along with sample photo’s although not as high of resolution. Just something to keep in mind. As of right now I am having troubles using the photo upload on the Yahoo Profiles site so anyone viewing there will need to use Flickr to view the sample photo’s.
http://profiles.yahoo.com/stacyvaughn68
www.stacyvaughndavis.blogspot.com
www.flickr.com/stacyvaughn68
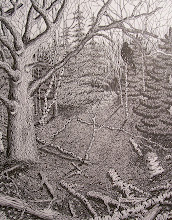
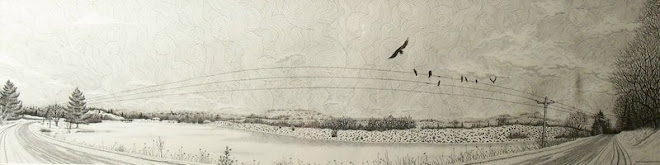
 Now once I have completed outlining one side of the work I complete the line work in the distant tree line using my .30 mm pen to do the vertical line work along with some distant pine trees and telephone line poles. I then will take my .25 mm pen and add some more vertical line work to the distant tree line to add depth and tone.
I continue with my .25 mm pen and begin working on the actual power and telephone lines crossing my skyline of the piece. I also begin stippling in the road and sidewalk. The road and sidewalk will be stippled entirely but I will go back in later on in the work’s progress and add anything like potholes and cracks and things of that nature. Do not worry about that now…focus on the first steps and follow each step and the work will come out great…rush anything and you will have problems. You will also notice I have some birds sketched out…ignore those for right now. Chances are I may not ink those in and go with something different but in any case I usually leave the sky for last but what ever works for you is what you go with, I just give suggestions.
Remember that 360 will be closing on July 13th 2009. You will still be able to follow along on the sites I have provided below.
http://profiles.yahoo.com/stacyvaughn68
www.stacyvaughndavis.blogspot.com
www.flickr.com/stacyvaughn68
 Well I hope everyone had enough time to get the graphing done and the sketch of either the photo sample I provided or your own photo completed up to now. Also I would like to inform everyone that with Yahoo 360 closing I will be posting on Yahoo profiles, Blogger and Flickr from now on. My Yahoo profiles address is http://profiles.yahoo.com/stacyvaughn68 and is basically the same as 360 and Facebook. My Blogger address is www.stacyvaughndavis.blogspot.com which when you view the sample photos at this site the photos will actually upload much larger which will enable you to see so much more detail and finally my Flickr address is www.flickr.com/stacyvaughn68 which I will also be posting the lesson and sample photo(s). You will still be able to contact me with any questions.
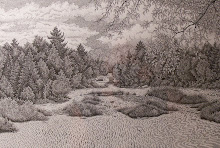
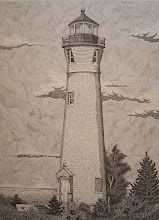
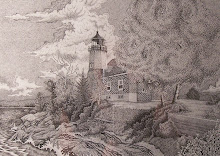
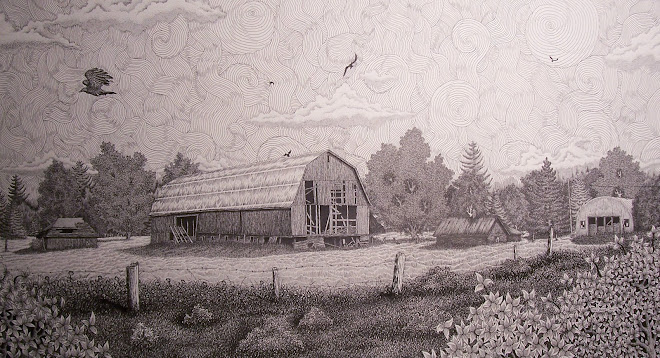
Now back to the lesson. As you can see by the sample photo I first did my graph and when that was completed I began the sketch in of my work. You don’t have to get every single detail from the photo you may be working on sketched out. Just go for the basics and forget the smaller details that would not be seen with the naked eye anyway. Do not try and sketch out in pencil every tile on a side of a building or every crack in a sidewalk…just think of it as a coloring book where you will add all the details when you are inking in. Keep the pencil sketch very simple like in my sample photo.
Once this has been completed take your .25 mm pen or your .30 mm pen and begin inking in the outlines of the buildings, sidewalk and telephone and power lines. Also take your .25 mm pen and add any tall grasses or distant tree lines in. If you want to you can add some stippling using the .25 mm pen along the shaded sides of the buildings once you have completed inking in the outlines. Remember to ink in any tree’s that are in the foreground before inking the buildings in. We will begin adding more details in next lesson post. REMEMBER!!! Yahoo 360 is closing on July 13th so write down the address so you do not miss any lessons.
http://profiles.yahoo.com/stacyvaughn68
www.stacyvaughndavis.blogspot.com
www.flickr.com/stacyvaughn68