skip to main |
skip to sidebar
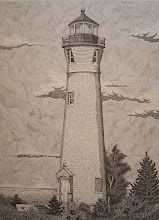
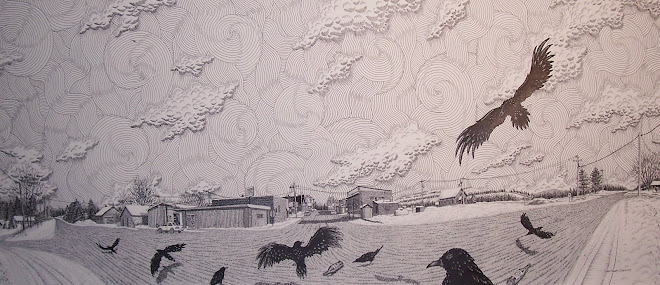
 On the new piece I have begun I wanted to concentrate on how I create buildings and the techniques I use to do so. I have included a photo of North Republic, Michigan the subject I have chose to do. You can substitute what ever you want and I strongly encourage you to do so but if you want you can work along with this one.
I am roughly about 50% completed with this piece and on a scale of 1 to 10, 1 being simple and 10 being extremely difficult I would rate this piece an 8 due to the fact that this will be mostly stippling and fine line work.
If you will be using the same subject photo as I am I suggest printing photo out as a 4” x 6” photo. Once you do that graph the photo out and then ready your working surface and then transfer that same graph to it by using this as a rule when graphing…if you have 1” squares graphed out on your photo then you can either transfer the same size to your work surface or what I do is enlarge it by at least a 1” = 1 ½” scale. Do not enlarge much over 2”. If you do go over 2” it will tend to distort the subject when transferring the sketch.
Get the graphing and layout sketch completed while waiting for next Monday’s post.
www.stacyvaughndavis.blogspot.com
www.flickr.com/stacyvaughn68
www.360.yahoo.com/stacyvaughn68
www.republicmichigan.com
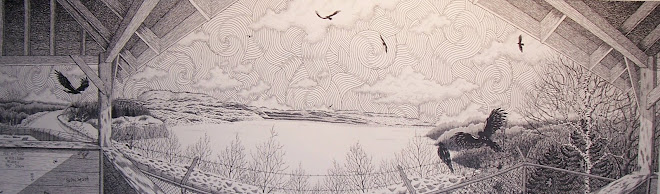
 Now to complete the piece I completed the distant tree line much as I explained in the April 16th post but I will only use my .25 mm pen and I will not worry about any detailed trees, just use small vertical lines and remember to layer them and then if you have enough space add some very small pine trees by just scribbling them in quickly.
I then will take my .30 m pen and finish stippling in the area along the road. You will have to determine how much you want in your piece but I decided to stay true to this area and add some deer tracks along with my nieces footprints in the snow. Keep in mind where your source of light is and then stipple everything in according to how the shadows will fall. Once I have that completed I will then complete the sky by using my .30 mm pen and stippling in the clouds and filling in around those clouds with very tight uniformed stippling. Once that is finished I switch to my .25 mm pen and then add fine detailed stippling to the clouds. Just some loose stippling will work well. Refer to the completed piece for more detailed sample photo.
In the next post I will begin a new piece that I have yet come up with a certain title yet. This piece is more complicated and will once again have use of conte’ pencils again. Choose what subject photo you want to work on and then have your work surface prepared for next lesson.
www.stacyvaughndavis.blogspot.com
www.flickr.com/stacyvaughn68
www.360.yahoo.com/stacyvaughn68
www.republicmichigan.com
 I apologize for no posts in the past few weeks but my younger sister Karen passed away in late April and I have been mourning her loss and will continue to do so for quite some time. But I do want to again apologize for the lateness in my posts and will continue where I left off in April on May 11th 2009 and ask for your understanding and patience.
I also would like to remind everyone that “Through My Eyes in Black & White” has opened at the Kerredge Gallery located in the Copper Country Community Arts Center in Hancock Michigan. The exhibit runs through May 5th -30th 2009 with a public reception on Thursday May 7th from 6pm-8pm but as of right now I do not feel I will be up to the Gallery talk so a statement will be read if I cannot make the opening reception and apologize for any inconvenience this may cause but hope you will understand.
I will continue Lessons and Samples from Aprils lessons on May 11th 2009. Thank you.
www.stacyvaughndavis.blogspot.com
www.flickr.com/stacyvaughn68
www.360.yahoo.com/stacyvaughn68
www.republicmichigan.com
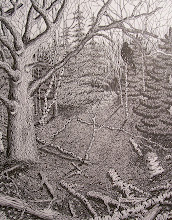
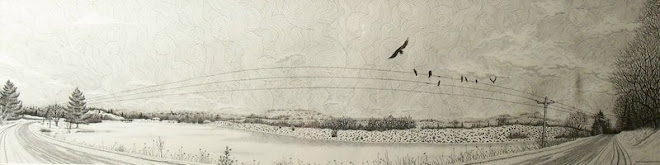
 If you’ll look at what I have done on the right hand side of the piece you’ll notice how I try and layer my vertical pen work. I start by drawing uniformed vertical lines and then add more if I want more texture and tone value. Remember that when you do this only apply them about half way to maybe three quarters of the way over your original lines. I am trying to create a good value of tones and if I had brought them all the way over my first application this would just be far darker than I want. I also will do separate bunches giving the feeling of many small tag elders grouped tightly together instead of just one continues bunching of trees.
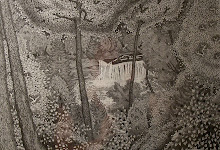
Also study how I have begun creating the tree in tree foreground. I have just drawn its outline and some curved line work to give it shape, I’ll wait later in the work to add detail. The pine tree directly behind it is done by outlining it and then scribble work (refer to study sheets in my Flickr account).
Also I began adding some of the stippling details to my nieces jackets using my .25 mm pen. You do not need to do this and for the beginners just concentrate on the trees and surrounding background. I just have a need for a bit of change in techniques and often will jump over to some other subject in my work but I ONLY do this when I have the general sketch work out…keep that in mind. Any questions email me.
www.stacyvaughndavis.blogspot.com
www.flickr.com/stacyvaughn68
www.360.yahoo.com/stacyvaughn68
www.republicmichigan.com
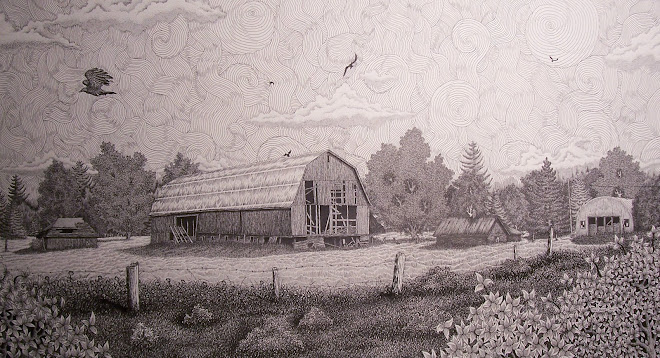
 Now I need you to refer to the pen & ink tree and foliage studies found on my Flickr account to begin work on the surrounding tree line of this piece. For you beginners I recommend taking a separate sheet of paper and practice these techniques before laying any ink on the actual piece you are working on.
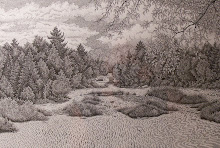
Keep in mind that you want to layer the tree line. Sketch in the trees that you want the detail on and then work back with some of the lesser detailed foliage and so on. Once you have those sketched begin inking the outline of them in. Now here is where it gets a little tricky. You will notice that you have spaces of white left in between those trees…here is where vertical lines come in. I want you to use your smaller sized pens and fill in all the spaces between those trees. Remember your perspective and make both your trees and vertical lines smaller and smaller as you work towards the bridge. Now for the tree line behind the bridge this we will do with the same vertical lines but before you do this complete both sides of the road nearest to your subjects.
If you have any questions email me.
www.stacyvaughndavis.blogspot.com
www.flickr.com/stacyvaughn68
www.360.yahoo.com/stacyvaughn68
www.republicmichigan.com
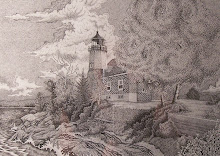
 OK I want to direct this piece mainly at the beginners but is great practice for the more advanced also. I used only my .25 mm and .30 mm pens for this piece along with a mechanical pencil for the graph and the general sketching and also have a Sanford magic rub eraser for any corrections that may need to be made during the sketching and also will be used upon completion of the work when all pen work is completed.
Since this was a commissioned piece I basically was confined to doing it from a photo provided. You’ll notice that the photo is in black and white. This wasn’t done specifically for a reason…the only reason was I had no colored ink left in my printer but having said that using a black and white photo as opposed to a color photo makes very little difference. As long as the photo has some workable detail then no problem.
When working from a photo, while doing the graph keep in mind that you are able to enlarge the piece by enlarging the graph that you use on your piece itself. Example: If you use one inch square graphing on the photo then enlarge the graph on your piece to one and one half inch squares. Just remember not to go much larger than two inches because will begin to distort. Get this completed and also complete the sketch in work and we’ll cover the beginning pen techniques in next post. Any questions email me.
www.stacyvaughndavis.blogspot.cm
www.flickr.com/stacyvaughn68
www.360.yahoo.com/stacyvaughn68
www.republicmichigan.com
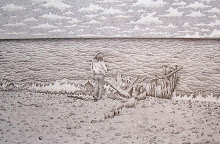
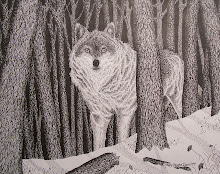
 “A Cold Decembers Day…” This piece I was commissioned to do in late November. The subjects are my nieces Dana and Danielle. It was done for their Grandparents as a Christmas gift in 2008.
For this work I only used my .25 mm pen and my .30 mm pen. This work is a break from the last piece requiring less detail work mostly for the fact that it is only an 11” x 14” piece. I want you all to notice in the next post that I have included a photo of how I graph it out and also I want you to notice how I take many liberties on the actual composition itself. Like the fact that I added more snow than was actually upon the ground and also that I added less clouds but we’ll cover those things when we cross those bridges.
So in the mean time get your photo prepared and get your table and paper set up along with the graphs IF needed. This will be a simple piece and is ideal for the beginners also. Any questions just email me.
www.stacyvaughndavis@blogspot.com
www.flickr.com/stacyvaughn68
www.360.yahoo.com/stacyvaughn68
www.republicmichigan.com