skip to main |
skip to sidebar
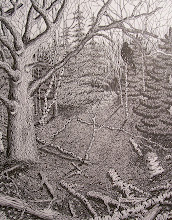
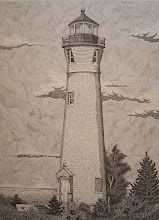
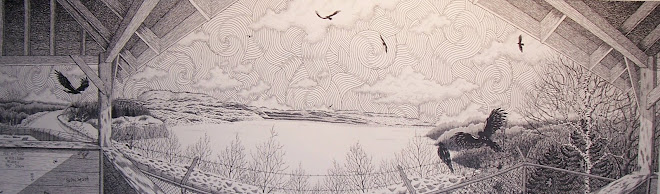
 If you’ll look at what I have done on the right hand side of the piece you’ll notice how I try and layer my vertical pen work. I start by drawing uniformed vertical lines and then add more if I want more texture and tone value. Remember that when you do this only apply them about half way to maybe three quarters of the way over your original lines. I am trying to create a good value of tones and if I had brought them all the way over my first application this would just be far darker than I want. I also will do separate bunches giving the feeling of many small tag elders grouped tightly together instead of just one continues bunching of trees.
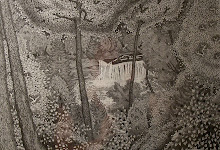
Also study how I have begun creating the tree in tree foreground. I have just drawn its outline and some curved line work to give it shape, I’ll wait later in the work to add detail. The pine tree directly behind it is done by outlining it and then scribble work (refer to study sheets in my Flickr account).
Also I began adding some of the stippling details to my nieces jackets using my .25 mm pen. You do not need to do this and for the beginners just concentrate on the trees and surrounding background. I just have a need for a bit of change in techniques and often will jump over to some other subject in my work but I ONLY do this when I have the general sketch work out…keep that in mind. Any questions email me.
www.stacyvaughndavis.blogspot.com
www.flickr.com/stacyvaughn68
www.360.yahoo.com/stacyvaughn68
www.republicmichigan.com
 Now for the final lesson and sample for this piece you just need either Conte’ Pencils or some good quality pastels or pastel pencils…whichever you prefer and also your .25 mm pen to complete the stippling in the hat. Now I ca only go over what I HAVE done on my piece so I give it to you step by step. IF you do not have a self portrait of yourself on your piece then ignore this.
I first complete my hat by just lining it in with my .25 mm pen and then filling in with some loose stippling. Add more stippling by overlaying to indicate shading and use line work to indicate the stitching in the hat and also any logo’s on it. Once that is complete I clean the pen in my ink cleaning solution and set aside.
Now here is the simplest part of the work…this is nothing more than what we did as children with a coloring book our parents bought us. You just color it in! I first begin by using flesh tone colors on my face. I avoid placing any color in the eyes yet . I then switch to a sepia color but just go with what YOU feel is right for you. I sparingly add any shadows to the bridge of my nose and cheeks using a stump to blend both colors to soften it out. ALWAYS add darker colors on lighter colors sparingly because when blending with a stump you’ll be amazed how it can spread. I then add a dark brown to my eyes and use the stump once again to soften the tone. I do the same thing on the fingers starting from light to dark. You may want to leave the large hand for last because you do not want any smearing of colors but you basically will do the same on the small hand as you will on the large.
I’ll begin lessons on a new piece I was commissioned to do as a Christmas gift. Any questions just email!
www.stacyvaughndavis.bogspot.com
www.flickr.com/stacyvaughn68
www.360.yahoo.com/stacyvaughn68
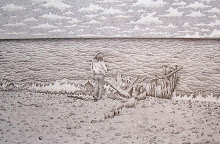
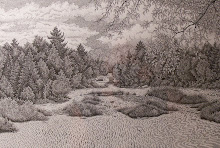
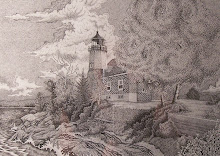
 After I completed the tree’s and foliage I then began the grass by using my .30 mm pen for the grass in the foreground then I switched to my .25 mm pen to finish off the grass towards the distant foliage. Refer to the study samples I have provided on my Flickr account. Every technique I use to create my works can be found there.
Once I completed the grass I began the stippling for the beach sand. First though I used my .30 mm pen to stipple in the footprints in the sand I had sketched in earlier. If you are doing just the beach scene I suggest you add footprints and maybe some dead wood that has washed up along the shoreline. This just adds visual interest and helps add 3 dimensionality to your work. Once I finished with these it was nothing but using my .25 mm pen to create the stippling in the beach…be patient, this will take a long time for the beginners.
In the next post I will be covering the waves and water and maybe begin covering the sky. Also I am thinking on finding a new site to post my lessons. I also post the same lessons on my Blogger account and will most likely switch entirely to that in the near future. I will continue posting photo samples of the lessons to Flickr so you may just go there also. Any questions just ask!
http://stacyvaughndavis@blogspot.com/
www.flickr.com/stacyvaughn68